No matter which brand of faucet you are using, with time it will eventually develop a problem. A loose faucet handle is a common issue homeowners face with time. A loose faucet handle not only affects the overall aesthetics of your bathroom but can also lead to leaks and water wastage.
With a loose faucet handle, it becomes difficult to control the water supply and temperature. The faucet won’t work as efficiently as you may need to. Due to the loose handle, the faucet won’t close fully and it leaks continuously that increases the surrounding damage and water bill. Here is a detailed guide on how to tighten a bathroom sink faucet handle.
- Tools Required
- How To Tighten a Bathroom Sink Faucet Handle? Step By Step Guide
- What Are the Risks of Ignoring a Loose Bathroom Faucet Handle?
- FAQs
- Final Thoughts
Tools Required
- Adjustable Wrench
- Screwdriver Set
- Allen Wrench
- Slip-Joint Pliers
- Basin Wrench
- Plumber’s Tape
Types of Bathroom Faucet Handles
Different types of faucet handles require various tightening techniques. To take the right action, you must first determine the type of faucet handles you have. The four prevalent styles of faucet handles are as follows:
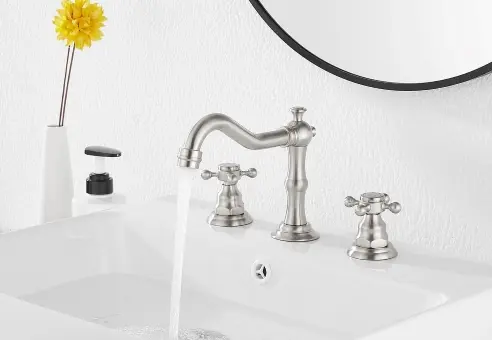
Compression Faucet Handle

Compression faucet handles are a type of faucet that have separate handles for hot and cold water, and they require compression to stop the water flow.
The handles on compression faucets are usually designed with a decorative cap on top, adding a touch of style to the overall faucet design. This traditional type of faucet design has been used for many years and is known for its durability and reliability.
Ball Faucet Handle

Ball faucets have a single lever handle that regulates both water flow and temperature. In a ball faucet, the handle has a rounded ball mechanism inside it rather than separate handles for hot and cold water.
A ball faucet’s lever handle rotates the ball inside the faucet body when you move the handle.
In order to control the mixing of hot and cold water to obtain the correct temperature, the ball features chambers and openings that line up with the hot and cold water inlets.
Ball faucets are a popular option in many contemporary kitchens and bathrooms because they are simple to use and provide precise control over water temperature and flow.
Cartridge Faucet Handle

Cartridge faucets are designed with a handle that moves in an up-and-down motion to control water flow and left-to-right for temperature adjustment.
Inside the handle, a cartridge is installed, which acts as the main control mechanism for the faucet to control flow and temperature.
The cartridge contains seals and openings. Cartridge faucets are known for their smooth operation and reliability, and they are commonly found in both residential and commercial bathrooms.
Ceramic Disk Faucet Handle

These faucets utilize ceramic disks, often made of durable ceramic or ceramic-like materials, as the main control mechanism of the faucet.
Inside the faucet body, there are two ceramic disks stacked on top of each other. When you move the lever handle, the bottom disk moves in relation to the top one, allowing water to flow through the openings in the disks.
How To Tighten a Bathroom Sink Faucet Handle? Step By Step Guide

Step 1: Turn off The Water Supply
It is important to turn off the water supply of the bathroom sink faucet before tightening its handle. Locate the shut-off valves beneath the sink and turn them clockwise to close the water supply. This step will stop the flow of water while you tighten the bathroom sink faucet handle.
Step 2: Remove The Decorative Cap (If Applicable)
If you have a compression faucet handle with a decorative cap on top, it’s necessary to remove it before starting to tighten the handle. The decorative cap is usually a small cover that adds an aesthetic touch to the handle.
Look closely at the top of the faucet handle and check if there is a decorative cap. Not all compression faucet handles have a decorative cap, so this step may not be applicable to every faucet.
If the cap has a small notch or groove, insert the tip of a flat-head screwdriver into the groove. Gently apply upward pressure on the screwdriver to lift and remove the cap.
If the cap does not have a visible notch or groove, attempt to twist and lift it with your fingers. Apply gentle force while turning the cap counterclockwise or pulling it straight up.
Step 3: Tighten the screw or nut
The tightening method will depend on the type of faucet handle you have. Follow the instructions below based on the specific faucet handle type:
Compression Faucet Handles: Tightening The Packing Nut
- Look beneath the handle and identify the packing nut, which is a hexagonal-shaped nut.
- Get an adjustable wrench that fits the size of the packing nut. Position the wrench on the nut.
- Turn the wrench clockwise to tighten the packing nut. Apply steady and even pressure until the nut is secure. Be cautious not to overtighten, as it can lead to difficulty in turning the faucet handle.
Ball Faucet Handles: Tightening The Adjusting Ring
- Look beneath the handle and locate the adjusting ring. It is usually a notched or ridged ring encircling the valve stem.
- Get a pair of pliers with a good grip. Position the pliers on the adjusting ring.
- Turn the adjusting ring clockwise with the pliers until it feels snug. Avoid using excessive force, as it can cause damage to the faucet. The handle should now be securely tightened.
Cartridge Faucet Handles: Tightening The Retaining Nut
- Look below the handle and identify the retaining nut. It is a round or hexagonal-shaped nut.
- Choose an adjustable wrench that fits the size of the retaining nut. Place the wrench on the nut.
- Turn the wrench clockwise to tighten the retaining nut. Apply enough pressure to secure the nut firmly. Be cautious not to over-tighten.
Ceramic Disk Faucet Handles: Tightening The Mounting Screws
- Look at the base of the handle and identify the mounting screws. There are usually two screws securing the handle.
- Get a screwdriver that matches the type of screws used. It could be either a flat-head or a Phillips-head screwdriver.
- Turn the screws clockwise using the screwdriver. Apply enough force to make them snug but avoid excessive force that may cause damage to the handle.
Step 4: Reassemble The Faucet Handle
Once you have tightened the screw or nut, it’s time to reassemble the faucet handle.
If you removed a decorative cap in Step 3, carefully position it back on top of the handle. Ensure that it aligns correctly and fits securely. Depending on the type of decorative cap, gently press it down or twist it clockwise to secure it in place. It should fit snugly and not be loose.
What Are the Risks of Ignoring a Loose Bathroom Faucet Handle?
Ignoring a loose bathroom faucet handle can lead to several risks and potential problems. Here are the risks associated with ignoring a loose faucet handle:
- A loose faucet handle can result in water leaks around the base of the handle or from the spout. Even a small, slow leak can waste a significant amount of water over time, leading to increased water bills and unnecessary water consumption.
- Water leaks from a loose sink faucet handle can seep into the bathroom sink or countertop, causing damage. Over time, this can lead to stains, warping, or even structural damage to these surfaces.
- A loose bathroom faucet handle may make it challenging to control the water flow and adjust the temperature accurately. This can be frustrating and inconvenient, especially when trying to achieve the desired water temperature for various tasks like washing hands or dishes.
- When the bathroom sink faucet handle is loose, it may not shut off completely, resulting in a continuous drip or trickle of water. This can waste a significant amount of water over time and impact your water conservation efforts.
- A loose bathroom tap handle can cause unnecessary strain on the internal components of the faucet, leading to increased wear and tear. This can shorten the lifespan of the bathroom tap and result in the need for costly repairs or replacement sooner than expected.
- If left unaddressed, a loose faucet handle of the bathroom faucet can contribute to more significant plumbing issues. The constant movement and vibration of a loose handle can affect other parts of the faucet system, such as valves or connections, leading to leaks or malfunctioning.
FAQs
What Should I Do If The Faucet Handle Is Still Loose After Tightening?
If the handle remains loose after tightening, consider replacing worn or damaged parts, such as the cartridge or ball assembly, with new ones from your local hardware store.
Can I Use Any Type of Screwdriver or Wrench To Tighten The Handle?
The specific type of screwdriver or wrench required depends on your faucet handle. Refer to the manufacturer’s instructions or consult a professional if you are unsure about the appropriate tool for your faucet type.
Final Thoughts
Remember, a secure and properly tightened faucet handle is not only a matter of practicality and efficiency but also plays a role in maintaining the overall aesthetics and functionality of your bathroom. Don’t underestimate the impact of a loose handle and the potential risks associated with ignoring it. Take the necessary steps today to tighten your bathroom sink faucet handle and enjoy a worry-free and efficient faucet for years to come.

James Lewis is a seasoned plumber and faucet enthusiast who shares his expertise on Faucetsavvy.com. With over 15 years of experience in the plumbing industry, he’s passionate about helping homeowners find the perfect faucet for their needs. He’s also dedicated to empowering DIY enthusiasts with the plumbing knowledge and skills needed to repair and maintain their faucets.
Recommended By Faucetsavvy's Team
Best Kitchen Faucets of 2025: Sleek, Durable & Worth Every Penny Check Our Review

